
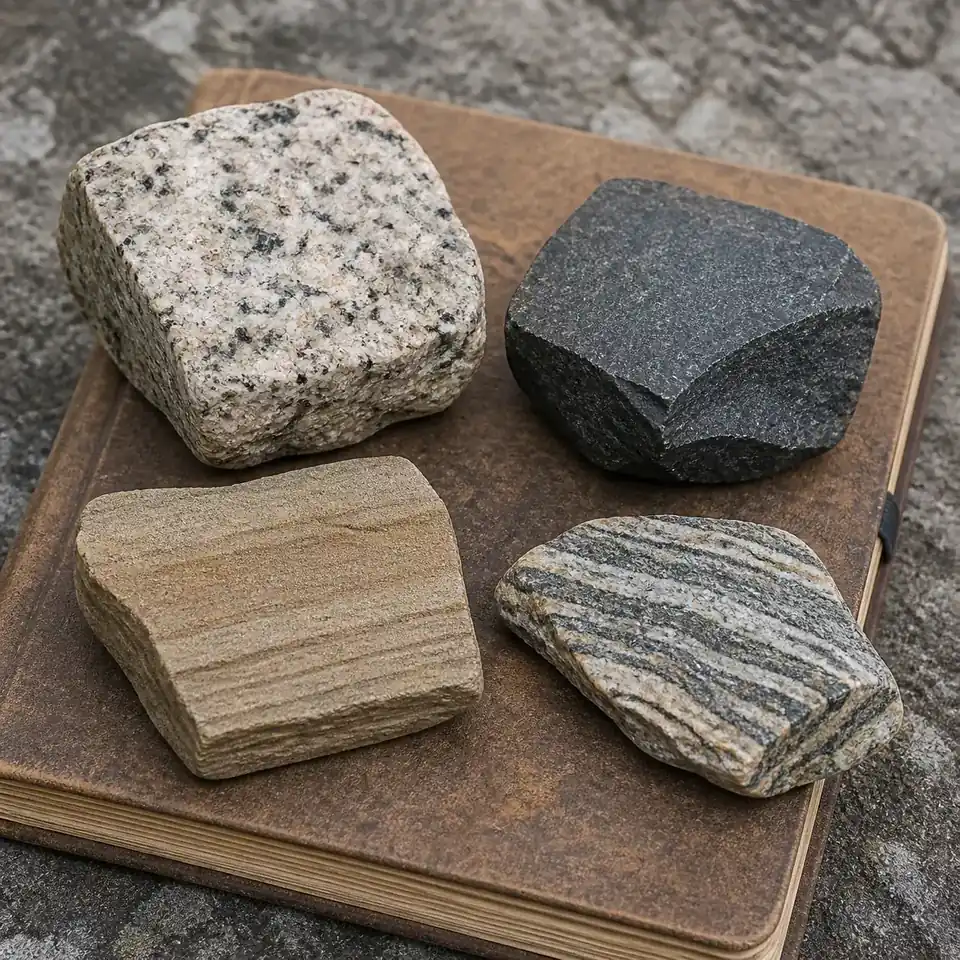
If you picked up an unfamiliar stone and wondered what kind of rock it is, the most reliable first move is to slow down. Rock identification is a process of comparing several clues, not matching one color to a name.
The practical method is simple: describe the specimen, decide which broad rock group fits best, inspect its texture and structure, and then compare it with likely lookalikes. A good result may be a narrow group rather than a perfect species-level identification—and that is still useful.
This guide is written for beginners, students, hikers, and collectors who want a repeatable way to start. It also explains when a photo-based rock identifier can help and when you should stop guessing and seek a geologist, museum, gemologist, or laboratory.
To identify a rock, use a clear close-up and record its color, grain size, texture, layers, pores, visible minerals, and fresh-versus-weathered surfaces. Compare those clues with igneous, sedimentary, and metamorphic rock groups before naming a likely match.
Step 1
Start with a clear specimen and useful notes
Before you search a rock identification chart, make the specimen easier to inspect. Brush off loose dirt without polishing away the surface, and photograph it in even daylight. Include one full view, one close-up of the texture, and—if safe—a view of a natural broken edge.
Write down where you found it only as context. Location can be helpful, but it should not override what the rock actually shows. A rounded river cobble, for example, may hide the original edges and make texture harder to read.
- Clean gentlyRemove loose soil with water or a soft brush when the specimen is stable; do not scrub a fragile surface.
- Use even lightAvoid strong flash, deep shadow, and colored lighting that changes the apparent minerals or streaks.
- Fill the frameKeep the rock large enough to show grain, pores, layers, and edges while leaving enough context to judge scale.
- Record uncertaintyNote what you cannot see, such as a fresh interior, exact hardness, or individual mineral crystals.
- A distant landscape photo is usually less useful than a sharp surface close-up.
- Photograph more than one side when the specimen has bands, layers, or a coated exterior.
- Do not break a specimen just to identify it, especially if it may be valuable, rare, or culturally important.
Step 2
Learn the three rock groups before choosing a name
The three broad rock groups are a useful first filter. Igneous rocks form when molten material cools, sedimentary rocks form from deposited or precipitated material, and metamorphic rocks change under heat, pressure, or chemically active fluids. Real specimens can be weathered, mixed-looking, or difficult to classify from one photograph.
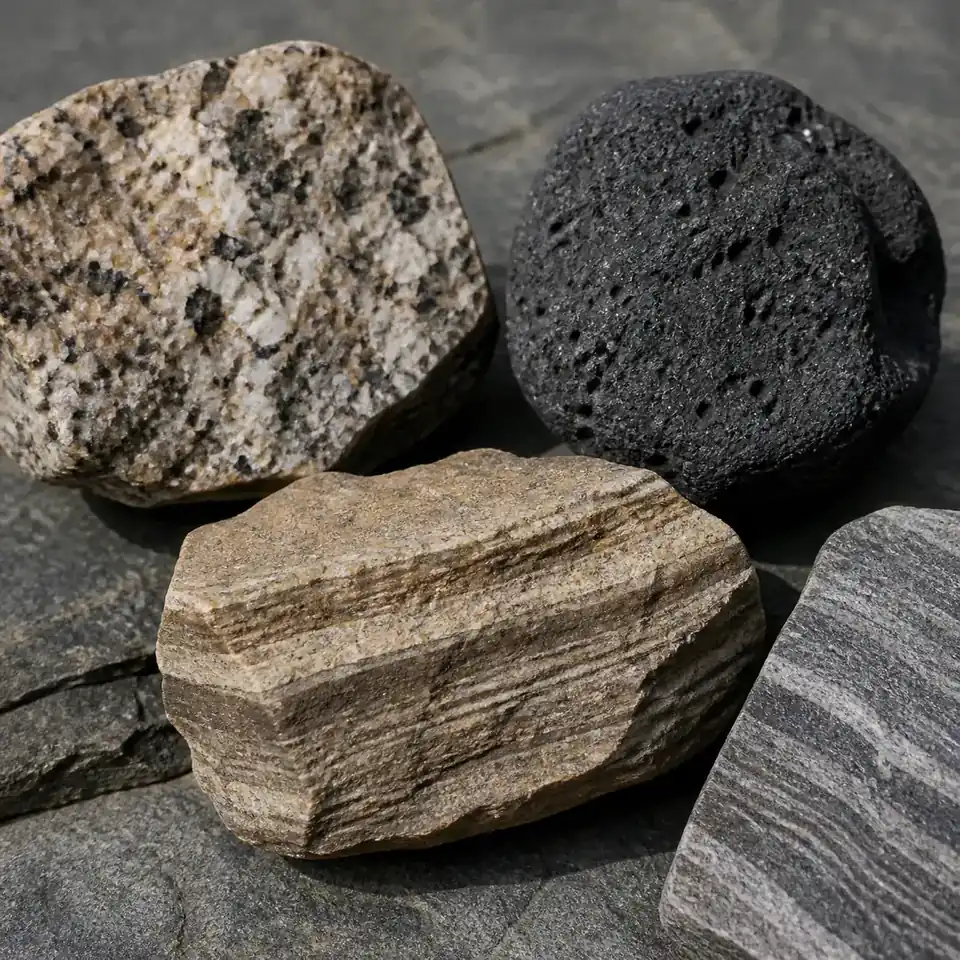
Use the group as a working hypothesis rather than a final verdict. If a dark rock has fine grains and small holes, an igneous explanation may fit; if a tan rock has repeated layers or cemented fragments, sedimentary clues deserve attention; if a rock has aligned bands or flattened minerals, metamorphic textures may be more plausible.
| Broad group | Clues to look for | Common caution |
|---|---|---|
| Igneous | Interlocking crystals, glassy surfaces, fine or coarse cooling texture, bubbles or vesicles | Weathering can hide the original cooling texture. |
| Sedimentary | Layers, rounded grains, cemented fragments, pores, fossils, or bedding planes | A single smooth surface may hide the bedding. |
| Metamorphic | Foliation, stripes, aligned minerals, recrystallized grains, folded or compressed bands | Banding can be mistaken for sedimentary layers. |
Step 3
Compare texture, grain, pores, and layers
Texture often tells you more than overall color. Ask whether the rock feels gritty, smooth, glassy, porous, flaky, or made of visible interlocking grains. Then look at grain size: are the particles too small to see, easy to distinguish, or mixed in a fine matrix?
Structure matters as well. Repeated layers suggest a different history from a random mix of crystals. Straight bands, wavy bands, holes, and rounded pebbles are not interchangeable clues. If the surface is coated with dust, lichen, or weathering, describe the coating separately from the underlying rock.
- Interlocking grains can support an igneous or metamorphic interpretation.
- Rounded fragments or sand-sized grains can support a sedimentary interpretation.
- Flat aligned minerals or repeated stripes may indicate pressure and recrystallization.
- Small holes may be vesicles, weathering cavities, or spaces left by dissolved material; do not treat every hole as proof of one rock type.
Step 4
Use color as a clue, not a conclusion
Color is easy to notice and easy to overtrust. A gray rock may be granite, basalt, slate, gneiss, or a weathered surface of something else. Iron staining can make a pale rock look red or orange, while moisture can make many surfaces look darker.
Instead of asking only “What color is it?”, ask which minerals or structures create that color. Look for repeated crystals, reflective flakes, translucent grains, colored veins, or a coating that can be rubbed away. Compare the same specimen in neutral daylight and shade when possible.
When a color is striking but the structure is unclear, keep the answer broad. “A dark, fine-grained volcanic-looking rock” is a better starting description than a confident but unsupported mineral name.
- Take a white-balance-neutral photo when possible.
- Separate surface staining from the rock's interior color.
- Do not infer value, rarity, or gemstone authenticity from color alone.
Step 5
Try simple hardness and streak checks safely
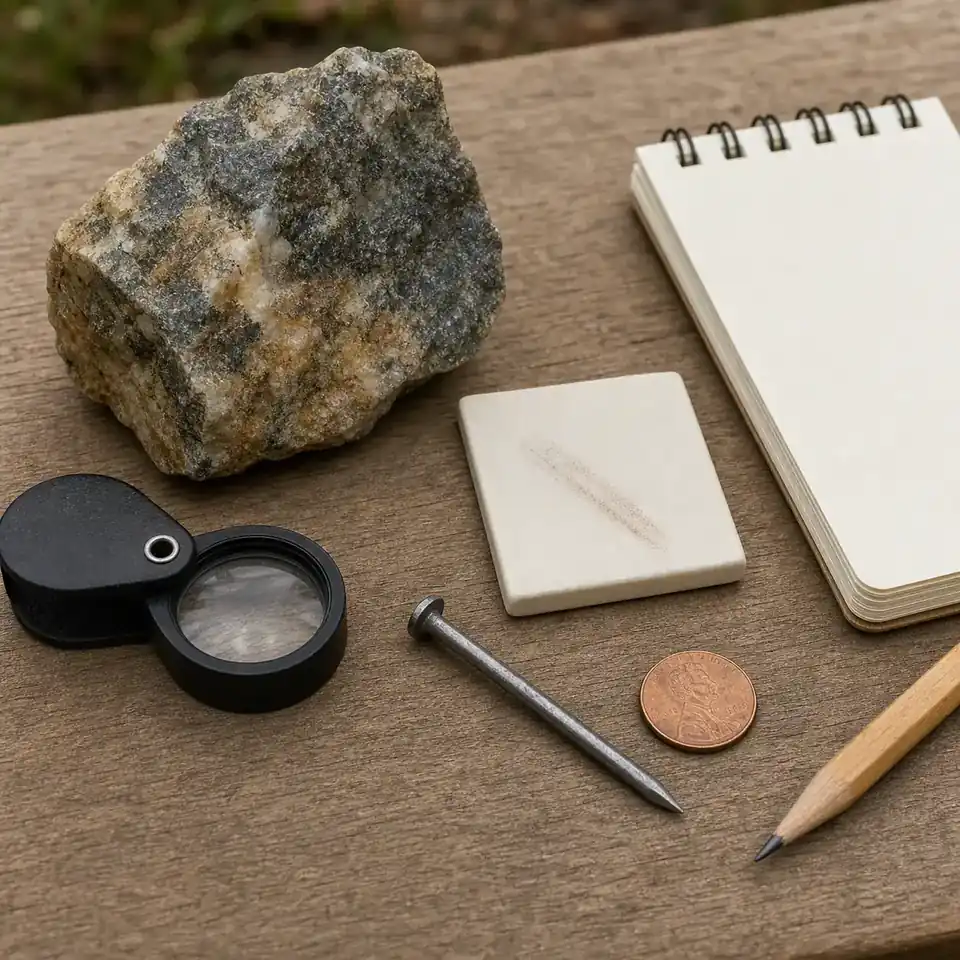
Simple tests can add evidence, but they should be gentle and secondary to observation. A steel nail, copper coin, or unglazed ceramic tile can help compare relative hardness or streak in a classroom-style setting. Use an inconspicuous edge, light pressure, eye protection, and a stable surface.
A streak is the color of a mineral's powder, not necessarily the color of its outer surface. A scratch result can also be misleading when the test object is dirty, the surface is weathered, or the specimen is a mixture of minerals. Record the result and the test conditions instead of treating one mark as a diagnosis.
- Do not use unknown acids or chemicals at home.
- Do not scratch a polished, valuable, museum, or culturally significant specimen.
- Avoid hammering rocks near people, animals, windows, or unprotected eyes.
- If the specimen may contain asbestos-like fibers, heavy metals, or another hazard, stop handling it and seek qualified advice.
Step 6
Check visible minerals and keep lookalikes in the answer
If you can see individual grains, describe them without rushing to a mineral name. Are they clear or opaque? Glassy or dull? Flat, blocky, needle-like, or flaky? Do they repeat throughout the specimen or appear only in a vein? These details can narrow the field more reliably than a generic label such as “sparkly rock.”
Good identification includes alternatives. Granite may be confused with other coarse-grained rocks; a dark fine-grained specimen may have several volcanic or metamorphic lookalikes; banded stones can be confused with layered sedimentary material. A short list of plausible lookalikes is more honest and often more useful than a single forced answer.
When you use a photo tool, look for the visual clues and possible lookalikes in the result. If the result does not explain why a match was suggested, treat it as a prompt for better observation rather than a final identification.
Step 7
Read a rock identification chart without overtrusting it
A rock identification chart is most useful when it turns observations into questions. Start with the broadest branch—crystalline, clastic, layered, glassy, porous, or banded—then compare the next clue. Do not jump to the most colorful photograph on the page.
Use the chart as a comparison tool, not a substitute for a specimen description. A chart may simplify weathering, mixed rocks, regional names, or the difference between a rock and a mineral. Keep a written trail of the clues that led to your working answer.
| Observation | Questions to ask | How to use it |
|---|---|---|
| Grain | Can I see crystals or particles? Are they interlocking? | Separate coarse crystalline rocks from fine or fragmental textures. |
| Structure | Are there layers, bands, folds, or pores? | Use structure to test the three-group hypothesis. |
| Surface | Is it fresh, weathered, stained, coated, or polished? | Avoid mistaking a surface coating for composition. |
| Test result | What did the gentle hardness or streak check actually show? | Use it as supporting evidence and record the conditions. |
Step 8
Use an online rock identifier when a photo can answer the first question
An online rock identifier is useful when you want a fast visual starting point from one specimen photo. Choose a sharp image with even lighting, visible texture, and enough of the edge or surface to show structure. The best result is not necessarily the most specific name; it is the result that explains the clues and shows reasonable lookalikes.
The Rock Identifier tool accepts a photo and returns a likely match, a broad rock group, visual clues, possible lookalikes, and a practical next step. It is designed to help you decide what to inspect next, not to replace a laboratory report or a professional opinion.
If the image is too blurry, distant, dark, or visually ambiguous, the tool may not narrow the specimen down. In that case, take a closer follow-up photo instead of repeating the same weak evidence.
Step 9
Know when a photo is not enough
A photograph cannot reveal every property that matters. Exact mineral chemistry, density, cleavage, magnetism, internal structure, treatment, provenance, and microscopic texture may require additional tests. A photo also cannot confirm whether a specimen is valuable, genuine, safe, or a meteorite.
If the answer affects a purchase, insurance claim, scientific record, land decision, health or safety question, or a valuable collection, stop at the visual shortlist and ask an appropriate professional. Preserve the specimen, your photos, the location notes, and any non-destructive observations so the next person can reproduce your reasoning.
Rock Identifier provides an AI-assisted starting point. It is not a laboratory test, professional appraisal, gem certificate, meteorite confirmation, or safety guarantee.
Questions beginners ask
Rock identification FAQ
What is the fastest way to identify a rock?
Start with a clear close-up, then compare texture, grain size, layers, pores, and visible minerals. Use the three rock groups as a first filter before considering a more specific name.
Can I identify a rock from a photo?
A photo can suggest a likely match when it shows the surface clearly, but it cannot prove composition, value, authenticity, or meteorite status. Use a photo result as a starting point.
How can I tell if a rock is igneous, sedimentary, or metamorphic?
Look for cooling textures and interlocking grains in igneous rocks, layers or cemented fragments in sedimentary rocks, and bands, foliation, or recrystallized textures in metamorphic rocks.
Is a scratch test safe for every rock?
No. Use light pressure on an inconspicuous edge, protect your eyes, avoid unknown chemicals, and do not damage a valuable or culturally important specimen.
What should I do if two rocks look alike?
Record the clues that differ, take a sharper photo, and report a short list of lookalikes rather than forcing a certain answer. Professional testing may be needed.
Can an online rock identifier certify a gemstone or meteorite?
No. Image identification can provide a visual starting point, but certification, valuation, authenticity, and meteorite confirmation require appropriate professional or laboratory work.
Reference reading
Rock and mineral basics
Next step
Identify the clues before you name the rock
The strongest beginner workflow is repeatable: photograph the specimen clearly, describe texture and structure, choose a broad rock group, compare lookalikes, and record what remains unknown. That process is useful even when the final answer needs professional testing.
When you are ready to compare a specimen photo with likely matches, use the online Rock Identifier as a visual starting point and follow its suggested next photo or follow-up check.
Try Rock Identifier